Hello,
I just received an Edwards E2M5 vacuum pump in the mail for about $180. It looks good on the outside but is missing the inlet flange and exuaght cap (which doesn't matter). I plugged it in and it powers up perfectly fine. I don't have new oil or a vacuum gage to test its power. Even if I did have those, it wouldn't be worth it in my opinion. I open up the pump to reveal the inside of it... and it was disgusting. It was rusted and filled with gunk. I will show pictures soon.
On this note, I don't think it will do very well in terms of performance. I spent all my money on a TPU-100 so I will probably buy the oil and vacuum gage after new years. Because of how bad the inside really looks, I wanted to try and clean the pump.
Now the problems I'm facing... I can't find any manuals that properley detail the making of the pump. Without that resource, I don't I would be able to make the repair. I also don't know where to obtain an inlet valve for a price lower than $100!!!
So here I am asking the greatest of the great if you could help me find the required manuals or diagrams. I also don't know where to begin. I'm going to open the whole thing and take pictures along the way to make sure I know how the arrangement works. I also ask if I require a repair kit. I looked at one person in this form who repaired his pump by only removing the rust using viniger and electrolysis, so I imagine I won't need to use a repair kit. Are there any links that you could offer that display how to clean and repair a pump, especially the E2M5.
This thread will probebly turn out to be a long one and I will record my progress throughout the process. Thank you for your time, and merry Christmas!
Cleaning/Repairing Edwards E2M5
-
Ameen Aydan
- Posts: 116
- Joined: Sun Apr 15, 2018 3:33 pm
- Real name: Ameen Aydan
Re: Cleaning/Repairing Edwards E2M5
Here's a start...
Instruction manual: https://www.yumpu.com/en/document/read/ ... ion-manual
Exploded view with part numbers: https://www.precisionplus.com/uploadedF ... E2M5-8.pdf
Pump overhaul / cleanup : http://www.eevblog.com/forum/reviews/ed ... l-cleanup/
Instruction manual: https://www.yumpu.com/en/document/read/ ... ion-manual
Exploded view with part numbers: https://www.precisionplus.com/uploadedF ... E2M5-8.pdf
Pump overhaul / cleanup : http://www.eevblog.com/forum/reviews/ed ... l-cleanup/
-
Richard Hull

- Moderator
- Posts: 15037
- Joined: Fri Jun 15, 2001 9:44 am
- Real name: Richard Hull
Re: Cleaning/Repairing Edwards E2M5
I own this exact pump and tried to sell it at HEAS 2018, but no takers. It easily goes to 14 microns at the head. I bought it 5 years ago and never used it or even looked at it. I have never opened it. I put TKO flushing oil in it in mid-September this year to see if it was worth selling, after it sat in a corner for those 5 years. It pulled down to about 30 microns. I ran it for 6 hours. I then dumped the oil and put in fresh, correct, pump oil and it pulled down to 14 microns.
Rust can be a very good thing in some instances. It is a polishing compound in its fine state. If a pump turns when received. Dump the oil and put in fresh oil, put plug on the inlet and run it for several hours. Dump the hot oil immediately and check it out. If filthy, this is often a good sign. Put in fresh oil and place a gauge on the inlet. If it drops below 50 microns in a minute or two you have something you can work with. If not, you probably need to throw it way assuming the seal are not leaking.
I have written FAQs on this process. I am stunned at how many never see them or heed them, but immediately take the pump apart even if it is running. Only a fool buys a pump and does not already own a good TC gauge. Get a known good gauge first.... monkey with obtaining and farting with a pump second. Never even open a pump that is running upon receipt. Give it a break, a chance to prove itself....Do your best to clean it and see what a gauge says before turning the first screw in dis-assembly.
Used pumps are always a "pig in a poke". Here at fusor.net and at E-bay we have a match made in heaven....Vacuum know nothings buying from vacuum know nothings. I have told in the FAQs how to buy a used pump and how to walk away from idiots selling something they have no knowledge of.
Richard Hull
Progress may have been a good thing once, but it just went on too long. - Yogi Berra
Fusion is the energy of the future....and it always will be
The more complex the idea put forward by the poor amateur, the more likely it will never see embodiment
Fusion is the energy of the future....and it always will be
The more complex the idea put forward by the poor amateur, the more likely it will never see embodiment
-
Ameen Aydan
- Posts: 116
- Joined: Sun Apr 15, 2018 3:33 pm
- Real name: Ameen Aydan
Re: Cleaning/Repairing Edwards E2M5
Hello,
I meant to say that I will be able to obtain some oil an a new gauge by the new year based on shipping. The question now is when will they arrive? I have taken some pictures with my crappy phone so the quality is not so good. Just as some backing, I did read all the FAQ's relating to primary pumps and made sure I knew what was going on before I went on any further. I didn't want to fill the vacuum up with until I had opened up the actual thing and had seen all the rust and corrosion, which has been a significant build up. I also don't have the inlet flange so there would be not way to even connect a vacuum gauge even if I had one! And no I'm not gonna buy one for over $100! But where can I get cheap one?
Anyways.. I did open up the box and didn't unscrew any important components until I had full knowledge on pumps and what not. The least I can say is this thing is severely corroded. I was pulling out chunks of rust! When opening just the box, the seal for the box literally SNAPPED like a twig. The whole entire thing is covered with a nice layer of rust. I've put some pictures some pictures.
Now I would like to ask if it is appropriate to clean it. That was not rhetorical or sarcastic, that is an actual question. Judging by Mr. Hull's reply it seems that rust will benefit me so I'm not sure where to go from here. I will 100% try using electrolysis to recover the dirty exhaust baffle though. I know where to get the a new gasket for $5 so that won't be a problem or a pain to replace. I seriously need to clean the bottom of the cover, but I don't know what method to use, any suggestions? I also want to clean the glass for the oil level indicator, again, any suggestions?
For the record, the vacuum does power on and I did put a piece of rubber on the inlet flange and in makes a good seal that's hard to take off. While doing so, the vacuum quiets down significantly and later after a couple moments makes a bumping noise. According to Mr. Hull's FAQ's that is normal if it does that a few times. As well, the pump had no oil when I was powering it up because according to my 'perfectly clean" oil level indicator, it had the right amount already in it... Fingers crossed there's no damage.
I also want to thank you, Mr. Stead, for providing the links. I have seen the manual and the repair links, though I didn't want to use the repair as it wasn't the same pump as mine, which now I have reconsidered. I really appreciate it.
Ameen Aydan
- Attachments
-
- Part of the broken gasket for the box cover
-
- Inlet valve. Any suggestions on where to get a good flange for it?
-
- The glass oil line. It is so dirty that you can't see the actual oil line. There is no oil in it!
-
- The inside of the cover. Notice the missing piece of the gasket.
-
- The disgusting exhaust baffle
-
- The scratch on the surface reveals the Clean part compared to the rust
-
- Nice layer of rust...
-
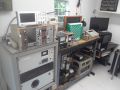
- Top view of my teenee tiny operation
-
Richard Hull
- Moderator
- Posts: 15037
- Joined: Fri Jun 15, 2001 9:44 am
- Real name: Richard Hull
Re: Cleaning/Repairing Edwards E2M5
Clean all the sludge from the oil tank...You call it "the box". The rest of the guts look OK. I would not take any more steps until to get it back together and put in fresh oil. Seal off the inlet. A threaded solid brass plug, should be easy to locate for the inlet. Once new oil is in and the inlet tightly sealed, run the pump for several hours, dump the oil and see what it looks like and get back to us. Don't gauge the pump until the dumped oil is relatively clean. You will have to figure out how to attach the gauge later.
Richard Hull
Richard Hull
Progress may have been a good thing once, but it just went on too long. - Yogi Berra
Fusion is the energy of the future....and it always will be
The more complex the idea put forward by the poor amateur, the more likely it will never see embodiment
Fusion is the energy of the future....and it always will be
The more complex the idea put forward by the poor amateur, the more likely it will never see embodiment
-
Ameen Aydan
- Posts: 116
- Joined: Sun Apr 15, 2018 3:33 pm
- Real name: Ameen Aydan
Re: Cleaning/Repairing Edwards E2M5
Hello guys!
Just back from new years and a really boring day! Who else did nothing all break?
So, I have finally cleaned up everything and got those extra parts I needed. These being the pumps oil, some flushing fluid and the OIL TANK gasket. The flushing fluid cost $12 per litre, oil was $16 per litre and the gasket was about $6. In all I highly recommend www.precisionplus.com with their very cheap stuff (compared to others) and excellent shipping quotes. Check them out!
So I did some work. First I cleaned the exhaust baffle. My first method was to just give it a little rinse with water and then I set up a simple electrolysis with a computer power supply. I used the 12 volt 10 amp wire and used baking soda as my electrolyte of choice. It worked very well for side one as shown in the picture only resulting in minimal pitting and a decent finish. the baffle was very badly rusted so It was fine by my standards. Side 2, however, did not do so well. See the rust build up was so bad that it took an hour with steel wool to get the sh*t off.
After that went semi-well I used the more... unpleasant method. I didn't know where to start so I asked my mum how to get rid of rust from bathrooms, so she gave me this spray bottle called scrubbing bubbles and I sprayed that on first. It worked pretty well on the thing to get rid of some skin rust and after words it was too thick to just wash off. So then I got some WD-40 and sprayed a generous amount all over and used steel wool to hack at the thick rust. Again, I gave some good elbow grease and a lot of WD-40 for all the stuff to come off. I was fine with the end result, but side 2 had some very bad pitting. I don't like it but it won't affect the performance just the cosmetics.
Now for the OIL TANK. I first scraped the rust and oil mixed gunk on the bottom of the tank off and into the garbage. then I proceeded to waste a full gallon of vinegar by submerging the whole thing in. I felt stupid. after letting it there for two days I was left with nothing but what I started with. So I used the washroom cleaner stuff and sprayed and scraped and sprayed and scraped and sprayed and scraped and sprayed and scraped until i got tired and then just put some WD-40. It worked like a charm and left the thing new. I'm ready to reinstall the OIL TANK but i'm suffering a bit of an issue here. The level window for the oil is badly rusted and I want to clean it but I can't. In the pictures you can see how unclear it really is. I also took a picture showing the inside. The inside of the window is protected by some metal thing for which I can't find the name anywhere. It has three holes, of which two have a very weird type of screw.
Here lies the problem. What type of screw is it?!?!?! The thing has no shape! When I take a close look I just find that it is relatively small and the actual opening is just a circle. The hole inside is very deep and there is really no way to tell what it is! I posted some pictures down bellow. Does anyone really know what the hell this is. I tried to use some YouTube techniques to take it out with non of them working. I beginning to believe because of how odd the shape and appearance really is, it's not a screw at all! I'm getting very frustrated and I think that if I don't find a solution soon, I'm just gonna bend it away from the window and clean the thing then bend it back. As I don't want to ruin it, I really am relying on you guys because I have searched the internet countless times for this.
In all I'm ready to put everything together but I just need to clean the window first!!! I have ordered an MKS 901P 11040. I hope that is the right interface... I haven't found anything proper for the inlet valve yet. All I found is a brass plug but I need the KF one. Still searching. I might just use the lathe...
Here is the link to the pictures (Don't want to waste server space!):https://drive.google.com/open?id=1S5Kdd ... YCRFRp0QMZ
Ameen Aydan
-
Rex Allers
- Posts: 574
- Joined: Sun Dec 30, 2012 3:39 am
- Real name:
- Location: San Jose CA
Re: Cleaning/Repairing Edwards E2M5
Your dirty sight glass may be a bit of a challenge.
Looking at the exploded parts list there don't seem to be any parts defined in that area. It seems to be treated as part of the oil box (that's what the list calls it). It looks like the glass is attached to the box with some kind of glue. (Look close to where metal and glass meet on the outside.)
What you think are screws may be some kind of ports to let the oil flow in the bottom and air out the top. Do you have some kind of syringe or squeeze bulb that you could use to inject your cleaning fluid or oil in one port -- see if it comes out the other.
Maybe you can put something in there to eat the rust and dirt off the glass. Paint stores usually sell phosphoric acid to prep metal for painting. It is pretty good at dissolving rust. It's the active ingredient in naval jelly, maybe scrubbing bubbles too? Downside of trying that is it might be hard to clean out anything you put in there before you fill and use the pump.
Maybe someone else has first hand experience with the sight glass to share.
Rex Allers
-
Dennis P Brown
- Posts: 3190
- Joined: Sun May 20, 2012 10:46 am
- Real name: Dennis Brown
Re: Cleaning/Repairing Edwards E2M5
You have done some good work cleaning that housing. The key, of course, isn't the housing but the internal pump assembly - rotor assembly, vanes and associate mechanical parts. Before worrying about the sight glass, that should be your primary concern.
I suggest warming it (in an oven to 50 C but no more) and then using oven cleaner. Let it soak in for an hour, and then rinse with hot water. That might get most of those organics off.
I suggest warming it (in an oven to 50 C but no more) and then using oven cleaner. Let it soak in for an hour, and then rinse with hot water. That might get most of those organics off.
-
John Futter
- Posts: 1850
- Joined: Wed Apr 21, 2004 10:29 pm
- Real name: John Futter
- Contact:
Re: Cleaning/Repairing Edwards E2M5
The oil sight glass is o-ring sealed to the box
be careful it is easy to break it when attempting to remove.
Our Mch workshop @ work made a new one out of perspex when we broke one
be careful it is easy to break it when attempting to remove.
Our Mch workshop @ work made a new one out of perspex when we broke one
-
Ameen Aydan
- Posts: 116
- Joined: Sun Apr 15, 2018 3:33 pm
- Real name: Ameen Aydan
Re: Cleaning/Repairing Edwards E2M5
Hello all,
Update: I managed to remove most of the crap. Thank you all for your recommendations. So I used all your guys advice. Here's what I did:
1. (This was before I even made the last post) I put a ton of WD-40 in the little place and let it sit there for a week. Most of it evaporated and becuase it was in my garage it was cold so I think that contributed to the crappy result.
2. After doing so, I dumped the stuff out and put some more in but this time I also prepared a hot bath. I don't know the temperature but it was boiling before I put into the container. Then I sealled all the ports and put the oil tank in. I made sure no water got into the inside so as it didn't mix with the WD-40. Better results but nothing good.
3. I didn't have any oven cleaner so I just opted to using the bathroom cleaner. I first sprayed a ton on the interior. I proceeded to add some water to allow the foam to mix and actually penetrate the grooves. I swirlled it around a little and let it sit for 5 minutes. Then I got my sink tap and put it to the most painfully hot setting. Then I sprayed the tap from a long distance strait into the groove to make a makeshift high pressure tap. The first time it worked very well taking out about half of the gunk. Repeating this about 5 times ultimately resulted in the best outcome. Pictures provided.
Now I'm gonna put this back on the pump, fill with FF, then the oil and show my results! I still need to find a proper inlet valve for gauging. I can't find anything so far for a good price. I need it to be a KF flange which is the biggest problem. Any recommendations?
Photo's --> https://drive.google.com/folderview?id= ... ZKGc0ZAKsR
Thank you for your time,
Ameen Aydan
-
Chris Mullins
- Posts: 67
- Joined: Sun Feb 19, 2017 11:32 am
- Real name: Chris Mullins
- Location: Shenandoah Valley, VA
- Contact:
Re: Cleaning/Repairing Edwards E2M5
A gauge that's been used by several here (I have two) is the MKS 901p, good from atmosphere down to 1E-5 Torr, with log analog output and serial interface. Here are a couple of discussions about it:
General discussion: viewtopic.php?f=10&t=11533
RS-232 interface board: viewtopic.php?f=10&t=11730
You can usually find them (used) on ebay for around $35-$45 with KF16 flange.
General discussion: viewtopic.php?f=10&t=11533
RS-232 interface board: viewtopic.php?f=10&t=11730
You can usually find them (used) on ebay for around $35-$45 with KF16 flange.
-
Bruce Meagher
- Posts: 148
- Joined: Thu May 12, 2011 11:25 pm
- Real name: Bruce Meagher
- Location: San Diego
Re: Cleaning/Repairing Edwards E2M5
You could try <https://www.ebay.com/itm/292158415411> for $12.50 shipped. The image below is what I received. It doesn't have the proper lip for an o-ring seal, but those on a budget can make it work. How to get a proper seal with these large BSP threads without an o-ring is an exercise left to the reader.Ameen Aydan wrote: ↑Thu Jan 03, 2019 6:50 pm ... I still need to find a proper inlet valve for gauging. I can't find anything so far for a good price. I need it to be a KF flange which is the biggest problem. Any recommendations?
Bruce
- Attachments
-
-
Dennis P Brown
- Posts: 3190
- Joined: Sun May 20, 2012 10:46 am
- Real name: Dennis Brown
Re: Cleaning/Repairing Edwards E2M5
On a mechanical pump, teflon tape will seal it very well. I've had success even with 10^-5 torr in my chamber but I don't recommend it generally for those high vac applications.
-
Ameen Aydan
- Posts: 116
- Joined: Sun Apr 15, 2018 3:33 pm
- Real name: Ameen Aydan
Re: Cleaning/Repairing Edwards E2M5
Hello
Thank you all so much for your suggestions, I can't say enough thanks in a life time. I just took a look and will purchase it soon. Since I'm from Canada, the price of shipping is $16 dollars... So as soon as I get that all worked out I should be able to purchase it. I also purchased an MKS 901P. The seller says the product is already calibrated and works perfectly! I purchased it long before the previous update, just forgot to mention it. Oh, and It was sold to me for $35 but the shipping was (as to be expected) $15. I hate it but I have to live with it... Oh well. An update on my pump will be coming soon. I just have to finish some useless homework first.
Ameen Aydan
-
Ameen Aydan
- Posts: 116
- Joined: Sun Apr 15, 2018 3:33 pm
- Real name: Ameen Aydan
Re: Cleaning/Repairing Edwards E2M5
Hi all,
I finally programmed my MKS 901P using python and got it reading pressures and stuff. I will detail the whole procedure later. I also finally got the necessary adaptors and clamps for testing so I got right to it.
Because the pics are really big in size i kept them in a separate google drive file. It's better to open them in a separate tab as I will be referring to them based on the number of the pic. I will use this system now and on. Here is the link to my results --> https://drive.google.com/drive/folders/ ... _cKYdHM7dh
So first I took out a little of the disgusting oil the was already in the pump (1). It was a viscous mess and I don't even know how beat this pump was.
Next, I put in about 3 quarters of FF into the pump and ran it for 6 hours total. Following that I decanted the oil and it was off colour but still had the original red colour. This clearly meant that something was being cleaning out! By now I hadn't gotten my gauge so I I couldn't do anything. 2 is the pic of the decanted oil.
Now, I added the little bit of FF I had so that the oil line was slightly above minimum. I was distracted with school and exams and the whole mess made me forget about it for month. I came back to it yesterday and I let the pump run for about 2 hours to let the oil warm up. The oil I decanted in pic 3 was very concerning. This was because of how dirty it was! I didn't expect it to look anything like that and so it was a complete surprise. This clearly meant that even though I used FF I should have left it for a bit longer! It also goes to show how frigin' dirty it is, and how much might be left.
So after that I out about a quarter of my normal vacuum oil into the pump, again, just above the minimum line, and let the run for 2 hours. It came out slightly less dirty than the FF I mentioned. Again, very concerning. Now I would also like to mention that even though I used a little bit of the oil, when I connected the gauge and I gave a good pump down, I reached 13 micron in about 3 minutes. It's not good but not bad either. So I tried doing it again, and again, and again. Every single time after that I only managed to get 10 Torr. I will put a video up soon, it'll be named 4.
OK so, I was pretty annoyed. So I just decanted the oil and added the rest of my bottle until there was enough oil that it was slightly bellow the max on the oil metre. I gave the same pump down and had everything connected properly. Again, I only achieved 10 Torr.
I'm still here and I don't know what to do. Here are my assumptions. I'm using the recommended teflon the Dennis told me about. I think that there is probably some really big leaking going on. I want to get the proper inlet but its too expensive. I might try welding a lip so I can get the proper o-ring seal. The second thing that I think is wrong is the gauge. When set to factory default the gauge reads 769 Torr at normal pressure. When I pumped it down and got to 13 microns, it displayed 740 Torr at normal pressure. So I set it back to factory default and got the 760 Torr again.
I put the gauge strait on the inlet so I think that when I pump down some of the pump oil got on the gauge and damaged the sensor. I wouldn't know if that's true because i'm not getting any red lights (indicate that the sensor is faulty). I know that when I swiped the inner part of the gauge it felt a bit oily, but I could never see any actual oil. Maybe it was just a placebo?!?
Anyways I have a lot more to show but I will leave it out for later. For now I just want to know if my pump is just garbage. I spent too much time and money on this so it would be disappointing to just throw it out. Is there anything wrong with my gauge? I don't know what steps to take at this point.
Ameen Aydan
Last edited by Ameen Aydan on Thu Feb 14, 2019 11:04 am, edited 1 time in total.
-
Dennis P Brown
- Posts: 3190
- Joined: Sun May 20, 2012 10:46 am
- Real name: Dennis Brown
Re: Cleaning/Repairing Edwards E2M5
Sorry the pump is still making your oil so dirty. By the way, I can only see one pic when I open the link you included - a pic of your tools and teflon tape. Is there only that pic?
You cleaned the inside case but did you dis-assemble the actual pump stages? I did this with my pump and cleaned it. That made a huge difference. Consider the amount of dirt/corrosion in your case, the inside of the pump chamber is likely bad, too. Hopefully, none of the critical surfaces are damaged. That those areas are contaminated might explain your failure o get down to a few microns. Your pump oil should stay clean when running the pump so likely the internal mechanism does need cleaning as well.
You cleaned the inside case but did you dis-assemble the actual pump stages? I did this with my pump and cleaned it. That made a huge difference. Consider the amount of dirt/corrosion in your case, the inside of the pump chamber is likely bad, too. Hopefully, none of the critical surfaces are damaged. That those areas are contaminated might explain your failure o get down to a few microns. Your pump oil should stay clean when running the pump so likely the internal mechanism does need cleaning as well.
-
Ameen Aydan
- Posts: 116
- Joined: Sun Apr 15, 2018 3:33 pm
- Real name: Ameen Aydan
Re: Cleaning/Repairing Edwards E2M5
Hello,
Thanks for your reply. I only cleaning the case and not the stages. Richard advised me not to do so until I tested the pump. I don't want to spend more money so i'm afraid of opening up the stages as that would require me to change the o-rings. I remember someone saying that the orings can only be used once...
I can do it but I think a confirmation would be better. I would also like to be 100% sure the gauge is not damaged. Do you think I should go ahead?
-
Dennis P Brown
- Posts: 3190
- Joined: Sun May 20, 2012 10:46 am
- Real name: Dennis Brown
Re: Cleaning/Repairing Edwards E2M5
Gauges can always mislead. So, confirming that it is accurate is very important.
As for my pump, the dis-assembly of the actual internal vacuum pump assembly was done without a kit. I did damage a flat gasket but silicon sealant fixed that. I reused the o-rings but that could be hit or miss - one did look really flat but I simply reused it (again, a little silicon sealant.) The pump works fine and gets me down to under 2 microns (guess I got lucky.)
I really did need to do it since I found issues with some internal parts that did need serious cleaning - springs, balls and some linking sections.
Doing this type of rebuild is a judgement call. I'd suggest first checking the gauge, of course.
Still, your oil is coming out dirty simply by normal operation and that is certainly an issue and will have to be addressed in all likelihood (and is costly to keep replacing.) Getting a rebuild kit might be worth the cost but as you said, you've put enough money into it.
Then it comes down to deciding how much another pump would cost. If the pump can't get down to a few microns (via a properly working gauge), then frankly, at that point, you have nothing to lose and a further break down would appear worthwhile. Failure and maybe just get rid of the pump. Success and you have the pump and at an acceptable cost. Of course, you could still buy a rebuild kit if you decide to keep it after discovering the o-rings are a once use only. Your call.
If you do decide to dis-assemble the vacuum stages (at some point), remember to take photo's to reference for re-assembly and keep the order correct for all stages during cleaning. They need to be re-assembled as they were originally.
-
Ameen Aydan
- Posts: 116
- Joined: Sun Apr 15, 2018 3:33 pm
- Real name: Ameen Aydan
Re: Cleaning/Repairing Edwards E2M5
Hello,
I think I will just go ahead with that route. I have seen people do it on these forums in the past so why not give it a go. If it doesn't go well and this thing is a peice of trash, then at least I know that I got my money back on it. I told the seller about the condition this pump and he refunded me all the money. I only spent money on the oil and gasket. About $100 as of now.
As for the gauge, the seller told me it was calibrated and in working condition. If that's the case then my pump is infact shitty. Maybe it's the Teflon seal? I dunno.
I will go ahead and disassemble the pump. Because i just put in the new oil yesterday I will just reuse it and filter it.
Do you know by any chance how long it took you? Do you think I can reuse the oil if it's that new, and unused? And last but not least, what is that silicon thing you were talking about? You don't have to answer the questions.
I fixed the Google drive link
I'll send an update soon.
Ameen Aydan
-
Bruce Meagher
- Posts: 148
- Joined: Thu May 12, 2011 11:25 pm
- Real name: Bruce Meagher
- Location: San Diego
Re: Cleaning/Repairing Edwards E2M5
Before you disassemble your pump are your sure you don't have a leak around the BSP threads on the intake flange? I know I steered you to the inexpensive intake flange, and as I mentioned this cheap version does not have a proper o-ring seal. The BSP threads are straight making it a little more difficult to seal. Are you just using a few wraps of teflon tape? You could try adding vacuum sealing tape, melt some beeswax around the fitting interface, use liquid teflon, or even try a few drops of vacuum oil at the interface to see if you have a leak here.
edit: I didn't read your post closely enough. I see you reached 13 mtorr previously, but now are only getting to 10 Torr. Something doesn't make sense. I think you have either created a leak between runs or your gauge is fouled.
Bruce
edit: I didn't read your post closely enough. I see you reached 13 mtorr previously, but now are only getting to 10 Torr. Something doesn't make sense. I think you have either created a leak between runs or your gauge is fouled.
Bruce
Last edited by Bruce Meagher on Thu Feb 14, 2019 7:59 pm, edited 2 times in total.
-
Richard Hull
- Moderator
- Posts: 15037
- Joined: Fri Jun 15, 2001 9:44 am
- Real name: Richard Hull
Re: Cleaning/Repairing Edwards E2M5
10 or even 15 microns is about the best one can ever hope for on a used pump. and will perform flawlessly using a diff pump or turbo. Short of a rebuild I would not expect much better. You have done the best that might be expected for a used pump. From my point of view, you are good to go for use in a real fusor. Even with the oil as is, you have a fine pump.
Richard Hull
Richard Hull
Progress may have been a good thing once, but it just went on too long. - Yogi Berra
Fusion is the energy of the future....and it always will be
The more complex the idea put forward by the poor amateur, the more likely it will never see embodiment
Fusion is the energy of the future....and it always will be
The more complex the idea put forward by the poor amateur, the more likely it will never see embodiment
-
Ameen Aydan
- Posts: 116
- Joined: Sun Apr 15, 2018 3:33 pm
- Real name: Ameen Aydan
Re: Cleaning/Repairing Edwards E2M5
Hello,
Bruce Meagher gave me his gauge to use and test and it’s giving the exact same results. 25 torr and that’s the max. My gauge reads 35 torr so I do need to calibrate slightly. Does anyone know if it is bad if I don''t calibrate? This clearly shows that there is nothing wrong with my gauge.
He did give me an intake flange but it was too big. Does anyone have one the are willing to lend me for a month or two?
These results are still using the Teflon seal. Because I got 13 micron last try then it seems that my problem is the inlet not being secure enough. I doubt that my pump would be doing something wrong if I previously got anything a good result...
An inlet should do the job
Ameen Aydan
-
John Futter
- Posts: 1850
- Joined: Wed Apr 21, 2004 10:29 pm
- Real name: John Futter
- Contact:
Re: Cleaning/Repairing Edwards E2M5
Get rid of the teflon tape
use loctite 569 Hydrulic sealant (thickliquid) or Loctite 290 (superwickin)
Teflon tape is for plumbing of water systems not high vacuum
use loctite 569 Hydrulic sealant (thickliquid) or Loctite 290 (superwickin)
Teflon tape is for plumbing of water systems not high vacuum
-
Ameen Aydan
- Posts: 116
- Joined: Sun Apr 15, 2018 3:33 pm
- Real name: Ameen Aydan
Re: Cleaning/Repairing Edwards E2M5
Would JB weld do the same?
-
Rex Allers
- Posts: 574
- Joined: Sun Dec 30, 2012 3:39 am
- Real name:
- Location: San Jose CA
Re: Cleaning/Repairing Edwards E2M5
Can you give us a pic of what you plan to connect to what?
I love JB Weld for connecting things that have vacuum down to 1 micron or a bit less. But where I have used it is to permanently connect pieces. It is not wise for something threaded you may ever want to unscrew.
Last discussed, I think it was sealing threads. Not a job for JB Weld unless you never want the option to undo it.
Assuming you are still trying to evaluate your pump's capability, give us that pic of how you will connect pump to your gauge.
Rex Allers