I managed to remove the connector that failed (obviously) but with some undue force. The silicone doesn't stick to the polypropylene as you mentioned, so I'm afraid that the assembly will pull apart. Could probably get the other one out, but it isn't broken so no need to tempt fate. I'll likely keep the o-rings as-is given that shouldn't ever have to remove the connectors less a failure.
I like the idea of a copper cap for field control. Now that you mention it, the solder joint and bullet connectors have pretty small radii and aren't that smooth. If my school's Ansys licensing server ever gets fixed, I could simulate the assembly to verify the hunch.
Thanks for the suggestions. I'll update once I've made some progress.
Liam David
Fusor Update - Liam David
-
Liam David

- Posts: 531
- Joined: Sat Jan 25, 2014 5:30 pm
- Real name: Liam David
- Location: PPPL
-
Liam David
- Posts: 531
- Joined: Sat Jan 25, 2014 5:30 pm
- Real name: Liam David
- Location: PPPL
Re: Fusor Update - Liam David
Just some pictures of stuff I've been working on.
Some problems, things in progress, or needed upgrades:
1. Mass flow controller doesn't like EMI which causes pressure spikes and then cuts off deuterium flow. Obviously not good for stability. Need to rework wiring and shielding.
2. Shielding the DAQ and speeding up the software to reduce errors.
3. Adding more data collection variables including chamber temperature, backing pressure, etc..
4. Data post-processing (filtering, interpolation, error detection, etc.) to remove noise and transients. Mostly done but can be improved.
5. Getting a proper MCA so I can do gamma spectroscopy and more interesting neutron activation.
6. Building a spectrometer to measure deuterium purity without risking my RGA.
7. Building a smaller neutron detector that's easy to move. Perhaps a Russian corona tube or BC-720 replica if I can find some ZnS(Ag).
8. Actually calibrating my neutron detector using more than just simulations. Would like to avoid buying a bubble detector. "Calibration" is currently TIER = 9.27*CPM at 15cm.
9. New aluminum end caps for better cooling and to allow for varying the chamber length.
10. Making the feedthrough more precise since symmetry is my limiting factor. The conductor is slightly bent thanks to McMaster's shipping.
11. Making more graphite grids of various sizes. Neutron numbers aren't that impressive yet.
12. Perhaps a chamber upgrade to a 4.5" conflat... Closer to the ID of the cube fusors and stability seems to be improved.
13. Fixing a Ludlum Model 19 micro-R meter. NaI(Tl) crystal is shattered and some of the front end transistors appear to be shot.
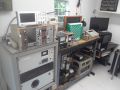
14. Cleaning up the cable salad that resides under my fusor.
Cleaning the new grid: https://youtu.be/d3YjzriigFY
Crappy quality video of GUI: https://youtu.be/WbZE7FX8KIw
Some plots using data from the DAQ. All are from the same short run where I varied the current limit from 0 to 8.5mA.
Some problems, things in progress, or needed upgrades:
1. Mass flow controller doesn't like EMI which causes pressure spikes and then cuts off deuterium flow. Obviously not good for stability. Need to rework wiring and shielding.
2. Shielding the DAQ and speeding up the software to reduce errors.
3. Adding more data collection variables including chamber temperature, backing pressure, etc..
4. Data post-processing (filtering, interpolation, error detection, etc.) to remove noise and transients. Mostly done but can be improved.
5. Getting a proper MCA so I can do gamma spectroscopy and more interesting neutron activation.
6. Building a spectrometer to measure deuterium purity without risking my RGA.
7. Building a smaller neutron detector that's easy to move. Perhaps a Russian corona tube or BC-720 replica if I can find some ZnS(Ag).
8. Actually calibrating my neutron detector using more than just simulations. Would like to avoid buying a bubble detector. "Calibration" is currently TIER = 9.27*CPM at 15cm.
9. New aluminum end caps for better cooling and to allow for varying the chamber length.
10. Making the feedthrough more precise since symmetry is my limiting factor. The conductor is slightly bent thanks to McMaster's shipping.
11. Making more graphite grids of various sizes. Neutron numbers aren't that impressive yet.
12. Perhaps a chamber upgrade to a 4.5" conflat... Closer to the ID of the cube fusors and stability seems to be improved.
13. Fixing a Ludlum Model 19 micro-R meter. NaI(Tl) crystal is shattered and some of the front end transistors appear to be shot.
14. Cleaning up the cable salad that resides under my fusor.
- Cooling the end caps with 40mm water blocks. Limiting factor is the (very) poor thermal conductivity of stainless. Fan still required to keep other arms cool. Neutron numbers have stabilized and there's no noticeable drop as the chamber warms.
- Neutron detector with paraffin moderator re-wrapped and bolted to the frame at a constant distance from the fusor.
- Feedthrough with new grid. 3D printed parts for alignment. Note bare stalk to grid.
- New graphite grid 0.75" OD x 0.75" long. Changing ID appears to have little effect on fusion rates. Needed a lot of heating and outgassing but is now stable.
- Patterns on end caps. Note asymmetry between the two. Grid is slightly misaligned.
- Misalignment evident because of the two beams on one side.
- Fusion plasma. The system can run indefinitely at 5e5. Arcing limits operation to 50kV currently.
- Data acquisition GUI, since upgraded to 10 samples per second. Neutron counts are acquired via an interrupt on an Arduino and integrated in software. Scalar agrees well with ratemeter.
- New aluminum water cooled end caps in the works with 1.5" quick connects.
Cleaning the new grid: https://youtu.be/d3YjzriigFY
Crappy quality video of GUI: https://youtu.be/WbZE7FX8KIw
Some plots using data from the DAQ. All are from the same short run where I varied the current limit from 0 to 8.5mA.
-
Richard Hull

- Moderator
- Posts: 15037
- Joined: Fri Jun 15, 2001 9:44 am
- Real name: Richard Hull
Re: Fusor Update - Liam David
Great work Liam! I see you are like me....always working off a list to stuff that needs doing. I am working fusor V prior to HEAS in October and have a project of finally using my $500 BC-720 5" scintillator coupled to my Hamamatsu 5-inch PMT in a light tight housing with internal pre-amp. Doubt if I'll have it ready for HEAS but the 3He detector is as great as always.
Keep up the good work. I look forward to you continued fine efforts. I love that out-sized insulator.
Richard Hull
Keep up the good work. I look forward to you continued fine efforts. I love that out-sized insulator.
Richard Hull
Progress may have been a good thing once, but it just went on too long. - Yogi Berra
Fusion is the energy of the future....and it always will be
The more complex the idea put forward by the poor amateur, the more likely it will never see embodiment
Fusion is the energy of the future....and it always will be
The more complex the idea put forward by the poor amateur, the more likely it will never see embodiment
-
Mark Rowley

- Posts: 909
- Joined: Sun Dec 29, 2002 12:20 am
- Real name: Mark Rowley
- Location: Sacramento California
- Contact:
Re: Fusor Update - Liam David
Impressive work Liam. I like the water cooled end caps and the new versions look like they can handle a much higher flow rate. Fwiw, I’ve found that Jon’s recommendation of using automotive super coolant makes a significant difference. Throw some ice in the coolant and it’s even better.
You’ll totally enjoy the MCA once everything is all set. Lots of fun.
Mark Rowley
You’ll totally enjoy the MCA once everything is all set. Lots of fun.
Mark Rowley
-
Dennis P Brown
- Posts: 3190
- Joined: Sun May 20, 2012 10:46 am
- Real name: Dennis Brown
Re: Fusor Update - Liam David
Great reporting and data collection/presentation. Top notch.
-
Liam David
- Posts: 531
- Joined: Sat Jan 25, 2014 5:30 pm
- Real name: Liam David
- Location: PPPL
Re: Fusor Update - Liam David
I finally got around to modifying a Ludlum Model 3 to output 5V pulses for each detection event, with the intent of making it a scalar. I tapped one of the schmitt triggers and passed the signal through a BNC connector in the meter face. An Arduino acting as a counter sends each second's total to a computer via serial.
The purpose was to make pretty decay graphs. I've been activating indium for several months but hadn't yet gathered quantitative data. I irradiated a ~1.5"x1.25" piece of indium "foil" for ~10min at 5e5n/s. A few-second transfer to a 2" pancake detector and an hour later, I obtain the following curve:
The decay of In-116m1 (54min) dominates the counts at later times but the initial count rate is much higher due to other short-lived isotopes including In-116m2 (2s), In-116 (13s), In-114 (72s). I haven't done a proper exponential fit, but by eyeballing the graph the counts appear to drop by half after about an hour. If only I had a gamma spec...
Also, some interesting patterns on the graphite grid:
The purpose was to make pretty decay graphs. I've been activating indium for several months but hadn't yet gathered quantitative data. I irradiated a ~1.5"x1.25" piece of indium "foil" for ~10min at 5e5n/s. A few-second transfer to a 2" pancake detector and an hour later, I obtain the following curve:
- Indium decay curve (sharp drops at ends of curve are an artifact of binning).
The decay of In-116m1 (54min) dominates the counts at later times but the initial count rate is much higher due to other short-lived isotopes including In-116m2 (2s), In-116 (13s), In-114 (72s). I haven't done a proper exponential fit, but by eyeballing the graph the counts appear to drop by half after about an hour. If only I had a gamma spec...
Also, some interesting patterns on the graphite grid:
- Notice ring on ID and different texture on ends of OD.
- Modified Model 3 with Arduino.
- Beat up, torn, etc.. piece of indium flattened from 1g ingot
- Paraffin neutron oven, in need of an upgrade. Indium is usually sandwiched between the two larger blocks.
-
Dennis P Brown
- Posts: 3190
- Joined: Sun May 20, 2012 10:46 am
- Real name: Dennis Brown
Re: Fusor Update - Liam David
Again, impressive. I'd be very interested in seeing how to connect to a computer via an interface as you did with that Ludlum; that is something others (I'd think) and certainly I would like to learn how to do. Could you maybe post a thread on this and provide details on both the method and code?
-
Liam David
- Posts: 531
- Joined: Sat Jan 25, 2014 5:30 pm
- Real name: Liam David
- Location: PPPL
Re: Fusor Update - Liam David
I have an older Ludlum Model 3 (#73001) with a manual that no longer exists on the internet, so I had to do some oscilloscope probing to find a suitable tap point. Pin 3 on the quad NAND gate CD4093BE is pulled high (10v) for 10us for each detection event. To make it TTL and Arduino compatible, I soldered a resistor divider between pins 3 and 7 (VSS). The signal passes to a BNC connector I installed in the front face.
For newer models most of the components have been changed and are also surface mount. I don't have such a meter, but here are a few possible tap points:
U8 acts as a comparator/discriminator for the signal coming from the preamplifier. The output is passed to the analog meter stages (not shown) and the audio chain, of which U9 is the first component. U9 is a monostable multivibrator, so it gives a single square pulse for each event. The circuit appears to be 5V so a voltage divider may not be necessary.
The signal is then connected to pin 3 of an Arduino UNO microcontroller set up as a scalar. Pin 3 is interrupt-compatible and each rising edge increments a count variable. For different Arduinos the compatible pins vary, however, so check the datasheet. Once a set time has passed, in my case 1s, the Arduino disables the interrupt, sends the count in that one second block to the computer using the Serial USB port, resets the count, and then reconnects the interrupt. In code this is very simple and takes just a few lines:
On the receiving on the computer, I just open the serial monitor in the Arduino IDE and have the values accumulate in the console. Getting the data is a simple copy-paste. I will write an automatic MATLAB script at some point to gather the serial data in a more elegant way, but for now this suffices.
For newer models most of the components have been changed and are also surface mount. I don't have such a meter, but here are a few possible tap points:
The signal is then connected to pin 3 of an Arduino UNO microcontroller set up as a scalar. Pin 3 is interrupt-compatible and each rising edge increments a count variable. For different Arduinos the compatible pins vary, however, so check the datasheet. Once a set time has passed, in my case 1s, the Arduino disables the interrupt, sends the count in that one second block to the computer using the Serial USB port, resets the count, and then reconnects the interrupt. In code this is very simple and takes just a few lines:
Code: Select all
#define INTERRUPT_PIN 3 //For Arduino UNO

uint32_t counts = 0; //32 bits is waaay more than needed, but doesn't hurt anything here
uint16_t period = 1000; // in milliseconds

void setup() {
  attachInterrupt(digitalPinToInterrupt(INTERRUPT_PIN), count, RISING); //Attach the interrupt to pin 3, triggering on a rising edge

  Serial.begin(115200); //Open serial communications at 115200 BAUD. Serial monitor on computer must be set to same BAUD rate
}

void count() {
  counts++;
}

void loop() {
  delay(period); //Wait for one second, during which count interrupts can happen

  detachInterrupt(digitalPinToInterrupt(INTERRUPT_PIN)); //So a particle event doesn't interrupt the serial transmission

  Serial.println(counts); //Send count to the computer

  counts = 0; //Reset count for next one second block

  attachInterrupt(digitalPinToInterrupt(INTERRUPT_PIN), count, RISING); //Reattach the count interrupt
}-
Liam David
- Posts: 531
- Joined: Sat Jan 25, 2014 5:30 pm
- Real name: Liam David
- Location: PPPL
Re: Fusor Update - Liam David
I spent some more time in the workshop today and put together a rudimentary MCA for my gamma spectroscopy setup. A Ludlum Model 12 provides the HV and the probe is a custom 85x60mm NaI(Tl) scintillator mated to a Photonis XP5312 9-stage PMT. A 3D printed housing holds everything together. The model 12 is tapped directly behind the HV capacitor and the signal is sent through a BNC connector installed into the can. I used a simple op-amp inverter and RC filter to smooth and shape the pulses such that peaks last a couple microseconds.
The ADC is a "Particle Photon" microcontroller that is intended to be used as an Internet of Things platform. Its core clock is 120MHz so it's far, far faster than an Arduino. The other main attraction is its 16-bit SAR ADC. I disabled the wifi which hogs processing power and simply connected the RC output of the circuit to pin A0. Unfortunately the usual analogRead() cannot achieve the necessary sample rates because of overhead and various default ADC settings it uses. I haven't measured the performance, but I'm guessing it's a few 10s of kSa/s at best. Since each sample takes ~100us and the peaks are only ~2us long, the problem is apparent.
The solution is to interface with the ADC directly, and interleave sampling with peak processing to reduce overall dead time. I set the ADC sampling period to just 3 clock cycles and and adjusted several other settings that I found in code examples online. The sampling and binning algorithm, in order of execution, is as follows:
1. Initialize an array of 2048 values representing the spectrum.
2. Initialize a buffer of 256 values that store the ADC data as they arrive.
3. Create two variables storing the current peak height and its index in the buffer.
4. For each index in the buffer, start an ADC conversion.
5. While the conversion is in progress, the CPU is free. Compare the previous ADC sample in the buffer to the current max peak height. If it's greater, the max peak height is this value.
6. Retrieve the current ADC reading.
7. Repeat 4-6 until the buffer is full.
8. If the peak height is above the threshold, in my case 1500/65535, and it does not occur within 10 indices of the start or end of the buffer (to mostly avoid catching rising or falling slopes), divide it by 32 and increment that index of the spectrum by one.
Every 1000 counts the spectrum is sent to the computer via serial. Dead time from processing and such is <5% so the majority of peaks are captured. It is important to note that this algorithm only captures a single peak (the maximum) per buffer, so obscuration of lower-energy peaks is possible but really only an issue at very high (>500kCPM) count rates. The most impressive metric, however, is that I can achieve an astonishing 900kSa/s at 32 bits. This means I can accurately capture the peak pulse heights which last ~2us. If I configure the microcontroller to periodically send the buffer instead of the spectrum, I can see each pulse:
I don't have many gamma sources, but I do have americium. The spectrum is a little rough, but I get ~25% FWHM for the 59keV gamma and something around 5-6% for background peaks around 600keV. The 26keV peak is "there" too, but the op-amp circuit smears it out since the pulse height is so small. Background peaks like K40 are there, as well as a couple others I am unsure about.
Some tweaking is still to be done, but I think this poor-man's MCA, costing some $20, should suffice for measuring indium and other activation products. Getting an indium spectrum is next on the list.
Here's the code, as a backup for myself and interested people:
- PMT input left, output to ADC right.
The ADC is a "Particle Photon" microcontroller that is intended to be used as an Internet of Things platform. Its core clock is 120MHz so it's far, far faster than an Arduino. The other main attraction is its 16-bit SAR ADC. I disabled the wifi which hogs processing power and simply connected the RC output of the circuit to pin A0. Unfortunately the usual analogRead() cannot achieve the necessary sample rates because of overhead and various default ADC settings it uses. I haven't measured the performance, but I'm guessing it's a few 10s of kSa/s at best. Since each sample takes ~100us and the peaks are only ~2us long, the problem is apparent.
The solution is to interface with the ADC directly, and interleave sampling with peak processing to reduce overall dead time. I set the ADC sampling period to just 3 clock cycles and and adjusted several other settings that I found in code examples online. The sampling and binning algorithm, in order of execution, is as follows:
1. Initialize an array of 2048 values representing the spectrum.
2. Initialize a buffer of 256 values that store the ADC data as they arrive.
3. Create two variables storing the current peak height and its index in the buffer.
4. For each index in the buffer, start an ADC conversion.
5. While the conversion is in progress, the CPU is free. Compare the previous ADC sample in the buffer to the current max peak height. If it's greater, the max peak height is this value.
6. Retrieve the current ADC reading.
7. Repeat 4-6 until the buffer is full.
8. If the peak height is above the threshold, in my case 1500/65535, and it does not occur within 10 indices of the start or end of the buffer (to mostly avoid catching rising or falling slopes), divide it by 32 and increment that index of the spectrum by one.
Every 1000 counts the spectrum is sent to the computer via serial. Dead time from processing and such is <5% so the majority of peaks are captured. It is important to note that this algorithm only captures a single peak (the maximum) per buffer, so obscuration of lower-energy peaks is possible but really only an issue at very high (>500kCPM) count rates. The most impressive metric, however, is that I can achieve an astonishing 900kSa/s at 32 bits. This means I can accurately capture the peak pulse heights which last ~2us. If I configure the microcontroller to periodically send the buffer instead of the spectrum, I can see each pulse:
- Concatenation of multiple buffers showing peaks
I don't have many gamma sources, but I do have americium. The spectrum is a little rough, but I get ~25% FWHM for the 59keV gamma and something around 5-6% for background peaks around 600keV. The 26keV peak is "there" too, but the op-amp circuit smears it out since the pulse height is so small. Background peaks like K40 are there, as well as a couple others I am unsure about.
- Am241 spectrum
Some tweaking is still to be done, but I think this poor-man's MCA, costing some $20, should suffice for measuring indium and other activation products. Getting an indium spectrum is next on the list.
Here's the code, as a backup for myself and interested people:
Code: Select all
#include "Particle.h"

SYSTEM_MODE(MANUAL);
SYSTEM_THREAD(ENABLED);

const uint16_t BUFFER_SIZE = 256;
uint16_t BUFFER[BUFFER_SIZE];

const uint16_t NCHANNELS = 2048;
uint32_t CHANNELS[NCHANNELS];

const uint16_t DIVISOR = 32;

uint32_t COUNTS = 0;

void setup() {
	WiFi.off();
	pinMode(D0, OUTPUT);

	setADCSampleTime(ADC_SampleTime_3Cycles);
	analogRead(A0);

	ADCx_Configuration(ADC2);
	configure_ADC_channel(ADC2,A0);

	Serial.begin(230400);
	waitFor(Serial.isConnected, 2000);
}

void loop() {
	while(true) {
		ADC_SoftwareStartConv(ADC2);
		while(ADC_GetFlagStatus(ADC2, ADC_FLAG_EOC) == RESET);
		BUFFER[0] = ADC_GetConversionValue(ADC2);
		uint16_t maxVal = BUFFER[0];
		uint16_t maxIdx = 0;

		#pragma unroll
		for(int i=1;i<BUFFER_SIZE;i++) {
//			pinSetFast(D0);

			ADC_SoftwareStartConv(ADC2);

			if(BUFFER[i-1]>maxVal) {
				maxVal = BUFFER[i-1];
				maxIdx = i-1;
			}

			while(ADC_GetFlagStatus(ADC2, ADC_FLAG_EOC) == RESET);
			BUFFER[i] = ADC_GetConversionValue(ADC2);

//      pinResetFast(D0);
		}

		if(maxVal>1500 && maxIdx>10 && maxIdx<BUFFER_SIZE-10) {
			CHANNELS[maxVal/DIVISOR]++;
			COUNTS++;

			if(COUNTS%1000==0) {
				sendSpectrum();
//          sendBuffer();
			}
		}
	}
}

void sendSpectrum() {
	for(uint16_t i=0;i<NCHANNELS;i++) {
		Serial.print(CHANNELS[i]);
		Serial.print(" ");
	}

	Serial.println();
}

void sendBuffer() {
	for(uint16_t i=0;i<BUFFER_SIZE;i++) {
		Serial.print(BUFFER[i]);
		Serial.print(" ");
	}

	Serial.println();
	Serial.println();
}

uint16_t readADCx(ADC_TypeDef* ADCx){
  ADC_SoftwareStartConv(ADC2);
  while(ADC_GetFlagStatus(ADC2, ADC_FLAG_EOC) == RESET);
  return ADC_GetConversionValue(ADC2);
}

void configure_ADC_channel(ADC_TypeDef* ADCx, uint16_t pin){
  STM32_Pin_Info* PIN_MAP = HAL_Pin_Map();

  HAL_Pin_Mode(pin, AN_INPUT);
  ADC_RegularChannelConfig(ADCx, PIN_MAP[pin].adc_channel, 1, ADC_SampleTime_3Cycles); //4.4 µs ???
}

void ADCx_Configuration(ADC_TypeDef* ADCx) {
  ADC_CommonInitTypeDef ADC_CommonInitStructure;
  ADC_InitTypeDef ADC_InitStructure;

  RCC_APB2PeriphClockCmd(RCC_APB2Periph_ADC1, ENABLE);
  RCC_APB2PeriphClockCmd(RCC_APB2Periph_ADC2, ENABLE);
  RCC_APB2PeriphClockCmd(RCC_APB2Periph_ADC3, ENABLE);
  ADC_CommonInitStructure.ADC_Mode = ADC_Mode_Independent;

  ADC_CommonInitStructure.ADC_Prescaler = ADC_Prescaler_Div2;

  ADC_CommonInitStructure.ADC_DMAAccessMode = ADC_DMAAccessMode_Disabled;

  ADC_CommonInitStructure.ADC_TwoSamplingDelay = ADC_TwoSamplingDelay_5Cycles;
  ADC_CommonInit(&ADC_CommonInitStructure);

  ADC_InitStructure.ADC_Resolution = ADC_Resolution_12b;
  ADC_InitStructure.ADC_ScanConvMode = DISABLE;
  ADC_InitStructure.ADC_ContinuousConvMode = DISABLE;
  ADC_InitStructure.ADC_ExternalTrigConvEdge = ADC_ExternalTrigConvEdge_None;
  ADC_InitStructure.ADC_DataAlign = ADC_DataAlign_Right;
  ADC_InitStructure.ADC_NbrOfConversion = 1;
  ADC_Init(ADCx, &ADC_InitStructure);

  ADC_RegularChannelConfig(ADCx, ADC_Channel_14, 1, ADC_SampleTime_3Cycles);

  ADC_Cmd(ADCx, ENABLE);
  // Start ADCx software conversion
  //ADC_SoftwareStartConv(ADCx);
}-
Liam David
- Posts: 531
- Joined: Sat Jan 25, 2014 5:30 pm
- Real name: Liam David
- Location: PPPL
Re: Fusor Update - Liam David
I finally got around to 3D printing and potting a new connector for the 2nd power supply, so max current is now 17mA. So far the connector's been fine to 50kV. Each power supply has its own 200k ballast resistor and protective diode string.
Since I'm using a linear grid, the corresponding endcaps get very hot during operation. Water cooling helps, but at 600-700W input the conductivity of stainless and flow rate aren't high enough and the chamber arms reach some 100C (making better endcaps is still on the list). In a previous post I showed the blue patterns that formed on the endcaps. These are now mostly gone, seemingly ablated by the extra current and heat and leaving bare metal again. I don't think it's simply a thin-film of non-interfering thickness since the graphite grids I use just turn the rest of the chamber black.
Removing the latest grid, which is graphite and more polished than those I've previously used, revealed a thin ring bisecting the ID. This is the same effect noted by a couple others using linear grids.
The graphite tends to outgas a lot, especially when it starts to glow, and the fusion rates plummet as the pressure rises and deuterium purity drops. My best runs are with the turbo minimally throttled and flowing a lot of gas. Baking the graphite with a blowtorch mostly solves outgassing but turns it glassy, crumbly, and brittle. Next step is to use a stainless grid just made from some tubing. My best run so far is ~8e5n/s for a few seconds before outgassing became a problem. 5e5 is sustainable indefinitely.
A few interesting thing of note:
I haven't identified the datasets (from my DAQ) which correspond to this effect, but I noticed a decrease in grid heating even with a 2x increase in power. At 45kV and 17mA the grid didn't start glowing even after several minutes. Once I decreased the voltage to 35kV at 17mA, the grid began glowing after a dozen or so seconds. This effect seems to be extremely sensitive to symmetry. Since my feedthrough is a quartz tube, I can rotate and vertically move the grid 0-360deg and +/-2cm. After messing with the positioning since the feedthrough stalk is slightly bent and needs upgrading, the effect disappeared in later runs. I haven't yet attempted replication since I need to improve the feedthrough symmetry first. I have very little experience with ion optics, but I'm inclined to believe that the increased voltage led to fewer ion-grid collisions caused by space-charge deflection. Also, the thermal angular momentum which contributes to defocusing is proportionally smaller because of the increased ion velocity. While I didn't pay explicit attention to the gauge, the drop in voltage must have been accompanied by a pressure increase, so background scattering rose as well. Bunch of ideas, don't know how much credibility they have.
With the most recent graphite grid (the outgassing one) I observed a remarkable increase in neutron output with a decrease in voltage (at constant current). Immediately after turning the power on the voltage dropped from ~44.3kV to ~42.3kV over about 15 seconds. Over the same interval, the neutron output rose from ~3.7e5 to ~4.6e5 (I use a scalar with an integration time of 3s). The pressure likewise rose from ~19.5mtorr to ~21.5mtorr. After those 15 seconds, however, the neutron output started plummeting. Another 15 seconds later (i.e. t0 +30), the stats were ~40.8kV, ~3.3e5, ~23mtorr. Clearly less voltage makes a difference, but I think a few other variables are at play. Initially the grid outgassed its absorbed deuterium, leading to higher fuel density and thus more beam-background fusion. This offset the voltage-decreased cross-section. After this source became depleted and the grid continued heating, the remaining air in the grid began contaminating the plasma. Notice the changing slope of the pressure rise not long after neutron output dropped. My gauge is a cold cathode which is has gas-dependent readings, and deuterium reads about 2x higher than air, so the decreasing slope checks out. A confounding factor is the increased permeation distance of the air as it outgasses from deeper in the grid, but we might expect this to be offset by the heating. It was glowing red by this point.
I intend to do independent voltage, current, and pressure parameter sweeps once I reinstall the upgraded feedthrough and have some respectable symmetry. More progress to come, school permitting.
- Potted connector before o-rings were installed and the whole thing covered in silicone grease.
Since I'm using a linear grid, the corresponding endcaps get very hot during operation. Water cooling helps, but at 600-700W input the conductivity of stainless and flow rate aren't high enough and the chamber arms reach some 100C (making better endcaps is still on the list). In a previous post I showed the blue patterns that formed on the endcaps. These are now mostly gone, seemingly ablated by the extra current and heat and leaving bare metal again. I don't think it's simply a thin-film of non-interfering thickness since the graphite grids I use just turn the rest of the chamber black.
- Endcaps almost clean again
- Other endcap
Removing the latest grid, which is graphite and more polished than those I've previously used, revealed a thin ring bisecting the ID. This is the same effect noted by a couple others using linear grids.
- Ring in grid
The graphite tends to outgas a lot, especially when it starts to glow, and the fusion rates plummet as the pressure rises and deuterium purity drops. My best runs are with the turbo minimally throttled and flowing a lot of gas. Baking the graphite with a blowtorch mostly solves outgassing but turns it glassy, crumbly, and brittle. Next step is to use a stainless grid just made from some tubing. My best run so far is ~8e5n/s for a few seconds before outgassing became a problem. 5e5 is sustainable indefinitely.
A few interesting thing of note:
I haven't identified the datasets (from my DAQ) which correspond to this effect, but I noticed a decrease in grid heating even with a 2x increase in power. At 45kV and 17mA the grid didn't start glowing even after several minutes. Once I decreased the voltage to 35kV at 17mA, the grid began glowing after a dozen or so seconds. This effect seems to be extremely sensitive to symmetry. Since my feedthrough is a quartz tube, I can rotate and vertically move the grid 0-360deg and +/-2cm. After messing with the positioning since the feedthrough stalk is slightly bent and needs upgrading, the effect disappeared in later runs. I haven't yet attempted replication since I need to improve the feedthrough symmetry first. I have very little experience with ion optics, but I'm inclined to believe that the increased voltage led to fewer ion-grid collisions caused by space-charge deflection. Also, the thermal angular momentum which contributes to defocusing is proportionally smaller because of the increased ion velocity. While I didn't pay explicit attention to the gauge, the drop in voltage must have been accompanied by a pressure increase, so background scattering rose as well. Bunch of ideas, don't know how much credibility they have.
With the most recent graphite grid (the outgassing one) I observed a remarkable increase in neutron output with a decrease in voltage (at constant current). Immediately after turning the power on the voltage dropped from ~44.3kV to ~42.3kV over about 15 seconds. Over the same interval, the neutron output rose from ~3.7e5 to ~4.6e5 (I use a scalar with an integration time of 3s). The pressure likewise rose from ~19.5mtorr to ~21.5mtorr. After those 15 seconds, however, the neutron output started plummeting. Another 15 seconds later (i.e. t0 +30), the stats were ~40.8kV, ~3.3e5, ~23mtorr. Clearly less voltage makes a difference, but I think a few other variables are at play. Initially the grid outgassed its absorbed deuterium, leading to higher fuel density and thus more beam-background fusion. This offset the voltage-decreased cross-section. After this source became depleted and the grid continued heating, the remaining air in the grid began contaminating the plasma. Notice the changing slope of the pressure rise not long after neutron output dropped. My gauge is a cold cathode which is has gas-dependent readings, and deuterium reads about 2x higher than air, so the decreasing slope checks out. A confounding factor is the increased permeation distance of the air as it outgasses from deeper in the grid, but we might expect this to be offset by the heating. It was glowing red by this point.
- Time-series voltage, pressure, TIER. x-axis in 0.1s increments so 120s are shown.
I intend to do independent voltage, current, and pressure parameter sweeps once I reinstall the upgraded feedthrough and have some respectable symmetry. More progress to come, school permitting.
-
Richard Hull
- Moderator
- Posts: 15037
- Joined: Fri Jun 15, 2001 9:44 am
- Real name: Richard Hull
Re: Fusor Update - Liam David
Great continuing work on your system. It seems there are always tweeks that we seem to find interesting to test out to better the performance. Good work and continued good luck in your efforts.
Richard Hull
Richard Hull
Progress may have been a good thing once, but it just went on too long. - Yogi Berra
Fusion is the energy of the future....and it always will be
The more complex the idea put forward by the poor amateur, the more likely it will never see embodiment
Fusion is the energy of the future....and it always will be
The more complex the idea put forward by the poor amateur, the more likely it will never see embodiment
-
Liam David
- Posts: 531
- Joined: Sat Jan 25, 2014 5:30 pm
- Real name: Liam David
- Location: PPPL
Re: Fusor Update - Liam David
My 2nd Spellman supply gave up the ghost the other day, so now I'm limited to 8.56mA/600W again. One of the two flyback's secondaries got crispy causing the voltage and current to misbehave, especially in parallel with the other supply. Unfortunately it's very much a proprietary part and I don't have the ability to wind another. I believe it was end-of-life when I bought it and operating the fusor finally pushed it over the edge.
After years of use, I was finally forced to clean my chamber. The graphite grids I've been using have a habit of depositing on the walls, and after a particularly hot run the other day the coating began flaking and causing arcing. I scrubbed the inside with fine steel wool, used some vinegar to help loosen things up, rinsed with isopropyl, and baked it in the oven at 200C for a few hours. While not shiny like new, it's a lot better.
The graphite grids were outgassing enough to limit long-term stability and letting the chamber sit overnight replenished the reservoir even after a thorough plasma bake. I made one from a 3/4" stainless pipe, with the added bonus of it not being super fragile. It turned nice and blue after heating up and there's a distinct ring on the inside as was also seen by Jon Rosenstiel. The ends also have darker bands.
There are two main limiting factors at the moment: symmetry and heating. The asymmetric discoloration on the two endcaps and just eyeballing were enough to confirm that the grid isn't quite coaxial nor centered. I 3D printed a new feedthrough aligner and a temporary jig that mounts to a flange and passes through the grid to improve things. Cooling the endcaps using water blocks is insufficient for one simple reason: stainless steel has terrible thermal conductivity. I'm planning to machine an aluminum chamber based on the new cube designs, and the larger ID will also help with stability at higher voltages.
I made a new lead box for the chamber which has helped cut down on x-rays a lot.
The data acquisition box was in dire need for an upgrade. Here's the much cleaner and less-prone-to-shorting V2, which has op-amps buffering the inputs/outputs to hide the impedances of the instruments, cables, etc... and a more spacious container. It'll also house the electronics, including full data logging, for a 2nd 3He neutron detector once that arrives. I plan to measure the anisotropy of the neutron output...
More to come after I finish the 2nd neutron detector.
After years of use, I was finally forced to clean my chamber. The graphite grids I've been using have a habit of depositing on the walls, and after a particularly hot run the other day the coating began flaking and causing arcing. I scrubbed the inside with fine steel wool, used some vinegar to help loosen things up, rinsed with isopropyl, and baked it in the oven at 200C for a few hours. While not shiny like new, it's a lot better.
- Thick deposition flaking after intense heating.
The graphite grids were outgassing enough to limit long-term stability and letting the chamber sit overnight replenished the reservoir even after a thorough plasma bake. I made one from a 3/4" stainless pipe, with the added bonus of it not being super fragile. It turned nice and blue after heating up and there's a distinct ring on the inside as was also seen by Jon Rosenstiel. The ends also have darker bands.
There are two main limiting factors at the moment: symmetry and heating. The asymmetric discoloration on the two endcaps and just eyeballing were enough to confirm that the grid isn't quite coaxial nor centered. I 3D printed a new feedthrough aligner and a temporary jig that mounts to a flange and passes through the grid to improve things. Cooling the endcaps using water blocks is insufficient for one simple reason: stainless steel has terrible thermal conductivity. I'm planning to machine an aluminum chamber based on the new cube designs, and the larger ID will also help with stability at higher voltages.
- Grid jig.
I made a new lead box for the chamber which has helped cut down on x-rays a lot.
- It has a lid.
The data acquisition box was in dire need for an upgrade. Here's the much cleaner and less-prone-to-shorting V2, which has op-amps buffering the inputs/outputs to hide the impedances of the instruments, cables, etc... and a more spacious container. It'll also house the electronics, including full data logging, for a 2nd 3He neutron detector once that arrives. I plan to measure the anisotropy of the neutron output...
More to come after I finish the 2nd neutron detector.
-
Richard Hull
- Moderator
- Posts: 15037
- Joined: Fri Jun 15, 2001 9:44 am
- Real name: Richard Hull
Re: Fusor Update - Liam David
Nice work, Liam! You have done amazing things in that little cross. I just gave up on my effort in so small a vessel. I look forward to your continuing reports.
Richard Hull
Richard Hull
Progress may have been a good thing once, but it just went on too long. - Yogi Berra
Fusion is the energy of the future....and it always will be
The more complex the idea put forward by the poor amateur, the more likely it will never see embodiment
Fusion is the energy of the future....and it always will be
The more complex the idea put forward by the poor amateur, the more likely it will never see embodiment
-
Mark Rowley
- Posts: 909
- Joined: Sun Dec 29, 2002 12:20 am
- Real name: Mark Rowley
- Location: Sacramento California
- Contact:
Re: Fusor Update - Liam David
Looking good Liam. Your lead box is similar to what I built which worked quite well. The remaining issue was leakage through the ceramic HV feedthru. Over 50kV the backscatter from that point was still an annoyance.
I’m sorry to hear about the Spellman demise and am going through a similar situation. I decided to try and wind my own flybacks and so far have had some encouraging results. I’m still waiting on some shipping delays with ordered parts but once done I’ll post more about the results and winding methods. Maybe something similar can be done with your supply.
Mark Rowley
-
Andrew Seltzman
- Posts: 810
- Joined: Sun Feb 01, 2004 8:02 pm
- Real name: Andrew Seltzman
- Contact:
Re: Fusor Update - Liam David
I happen to remember that a few some forum members bought spellmans that didn't due to issues on the circuit board, those likely have salvageable flybacks in them or perhaps a good candidate for a circuit board swap.
Andrew Seltzman
www.rtftechnologies.org
www.rtftechnologies.org
-
Liam David
- Posts: 531
- Joined: Sat Jan 25, 2014 5:30 pm
- Real name: Liam David
- Location: PPPL
Re: Fusor Update - Liam David
I bought another power supply which turned out to have the exact same issue. The left flyback is starting to get crispy. Will see if I want to do a flyback swap or return it.
On another note, my roughing pump is finally starting to give up the ghost after some 8 years. It's a 3cfm refrigeration pump that's survived one internal readjustment, but the motor is drawing too much current even though the vacuum is ok (~20mtorr on a good day). I scored a Varian SD-451, 14cfm monster off Craigslist for cheap. After an oil change, it pulls 8mtorr (edit: down to 5) on my chamber which has been sitting in atmosphere for a couple days. I'm sure it'll go lower after another oil flush and plasma baking. The highlights of this pump are an anti-suckback valve in case of a power failure (turbo pump saver) and quiet operation. The old pump sounds like a freight train in comparison.
I also bought 10lbs of paraffin and made a new neutron oven. Silver inbound along with titanium sheet for a cube fusor.
- Old pump for scale
- Neutron oven and indium bar
-
Richard Hull
- Moderator
- Posts: 15037
- Joined: Fri Jun 15, 2001 9:44 am
- Real name: Richard Hull
Re: Fusor Update - Liam David
Make sure you have your truss on when moving that new pump around. Sounds like the last mechanical pump you will ever need. Oh, be prepared for "oil mist aplenty". Those big boys can fog a room quickly, you gotta' cover that issue. As most everyone here knows I have vented mine since 2000 to the great out of doors. (bored a hole in the lab and sealed with silcone around the exiting pipe with a turn down fitting and a copper screen soldered over the exit. (keeps summer time outside insects out of the copper exhaust line.) I don't like bugs in my vacuum oil reservoir.
Richard Hull
Richard Hull
- Attachments
-
- Copper oil mist exhaust line installed for second time on fusor IV 2004. First line installed on Fusor III in 2000. Valve is critical to keep outside moisture out of the pump oil. Kept off (blocked) when pump is not running.
Progress may have been a good thing once, but it just went on too long. - Yogi Berra
Fusion is the energy of the future....and it always will be
The more complex the idea put forward by the poor amateur, the more likely it will never see embodiment
Fusion is the energy of the future....and it always will be
The more complex the idea put forward by the poor amateur, the more likely it will never see embodiment
-
Liam David
- Posts: 531
- Joined: Sat Jan 25, 2014 5:30 pm
- Real name: Liam David
- Location: PPPL
Re: Fusor Update - Liam David
Yep, ran the pump for a little while and the room started to smell like oil as expected. I had an activated charcoal filter for the old pump but need to make another, larger one. It's about 60lbs dry so quite the mass to move around.
Edit: Pump gets my chamber down to 2.8mtorr, low enough for my cold cathode gauge to come on automatically and I also can't ignite a plasma even at 30kV. The chamber has a tiny leak (~1torr overnight) so I think it can go lower.
Edit: Pump gets my chamber down to 2.8mtorr, low enough for my cold cathode gauge to come on automatically and I also can't ignite a plasma even at 30kV. The chamber has a tiny leak (~1torr overnight) so I think it can go lower.
-
Liam David
- Posts: 531
- Joined: Sat Jan 25, 2014 5:30 pm
- Real name: Liam David
- Location: PPPL
Re: Fusor Update - Liam David
I activated some silver sheet today (2x6x0.010"). Max CPM on a 2" pancake ~3s after shutoff was 2500. Estimated "TIER" on the highest run was 7e5n/s, with arcing limiting operation to 30-35kV. Activation lasted between 3 and 10 minutes, with the longest run corresponding to the highest TIER. The neutron oven is composed of 4, 4x4x15cm paraffin blocks with the closest face about 8cm from the inside of the endcap. The silver is sandwiched between the two closest to the fusor.
- Three separate runs
-
Richard Hull
- Moderator
- Posts: 15037
- Joined: Fri Jun 15, 2001 9:44 am
- Real name: Richard Hull
Re: Fusor Update - Liam David
Doing what you just did is why I got into fusion. Neutrons!! Needless to say, fusion, for me, is a means to an end and that end is neutron activation. I am glad you are having fun with fusion like me. That is, doing something instructive and interesting with it. The beauty of fusion is only the neutrons get out of the reactor. The limited low energy x-rays are easily stopped, though pesky, to be sure. As we do more and more fusion, more activation possibilities come into view. Coupled with high stability longer run times due to water cooling, yet more possibilities are open to the careful and thoughtful amateur experimenter.
The fusor is a great auto-limited neutron source in amateur hands. It will never have flux levels or operational periods in anyone's hands that can create any dangerous or long lived isotopes. Just enough to enjoy advanced amateur science at a rarified level near the top of the heap. Cook 'em up in the morning and, yes, they are weak and need good instrumentation to enjoy the fruits of your labor and, blessedly, they are dead and decayed by bed time.
I have a nice demo for groups and even individuals who want to see the fusor. I have a soda and a sandwich on a saucer, which they see me munch on from time to time while demonstrating the fusor. I take normal silver and count it prior to activation allowing all to see it at background radiation level. Then, after running the fusor, they see the silver count over 2000 cpm on my 2" pancake, initially. They ask isn't that silver now dangerous? I now take a last planned bite to finish the sandwich and take the Fiestaware saucer the sandwich was on and place it under the pancake counter to roar at 30,000 cpm. They look aghast and shocked. I explain that the silver will be radioactive for only about one half hour and then be dead. The saucer I was eating off of will be radioactive for hundreds of millions of years and get even more radioactive than it is today over time. I then go to the white board and attempt to educate them in the most basic radiation science.
Liam, good work!
Richard Hull
Progress may have been a good thing once, but it just went on too long. - Yogi Berra
Fusion is the energy of the future....and it always will be
The more complex the idea put forward by the poor amateur, the more likely it will never see embodiment
Fusion is the energy of the future....and it always will be
The more complex the idea put forward by the poor amateur, the more likely it will never see embodiment
-
Liam David
- Posts: 531
- Joined: Sat Jan 25, 2014 5:30 pm
- Real name: Liam David
- Location: PPPL
Re: Fusor Update - Liam David
I found what was limiting me to 35kV. The centering washer slipped and let the grid become misaligned. Moreover, I think I overtightened the grid stalk, which cracked the ceramic shielding washer when everything got hot. I just got some more washers in and will be back in business soon. The colorful sputtering probably didn't help the arcing either.
While everything was apart, I examined the cathode a little closer. There's a clear asymmetry caused by the stalk, certainly outside and probably inside the cylinder. The two bands on the ends thicken near the stalk and converge to it, and there's an interesting "cusp" on the inner wall. The patterns are more pronounced than last time because of the longer runtime and higher powers.
This is how the moderator is positioned for activation:
- Offset cathode
While everything was apart, I examined the cathode a little closer. There's a clear asymmetry caused by the stalk, certainly outside and probably inside the cylinder. The two bands on the ends thicken near the stalk and converge to it, and there's an interesting "cusp" on the inner wall. The patterns are more pronounced than last time because of the longer runtime and higher powers.
- "Cusp" in pattern caused by stalk asymmetry...?
- Ring where current flows in?
- Asymmetric bands, caused by stalk.
This is how the moderator is positioned for activation:
- Moderator blocks
- Silver from Rio Grande, with two pieces of indium.
-
Jim Kovalchick

- Posts: 717
- Joined: Wed Apr 13, 2011 8:00 pm
- Real name:
Re: Fusor Update - Liam David
Liam,
Your grid pictures look like you are getting arcs secondary to the tube axis like I am. See my latest post for picture.
Jim K
Your grid pictures look like you are getting arcs secondary to the tube axis like I am. See my latest post for picture.
Jim K
-
Liam David
- Posts: 531
- Joined: Sat Jan 25, 2014 5:30 pm
- Real name: Liam David
- Location: PPPL
Re: Fusor Update - Liam David
I haven't had any arcing, just the occasional sparking thanks to my grid shifting off-center. The spots on the side are from secondary beams that form once the voltage gets high enough, something like 5kV.
- Deliberately off-axis, secondary beam downward
-
Richard Hull
- Moderator
- Posts: 15037
- Joined: Fri Jun 15, 2001 9:44 am
- Real name: Richard Hull
Re: Fusor Update - Liam David
I love that "cock-eyed" view of the interior of the cathode. Lots of interesting data in that view related to fields.
Richard Hull
Richard Hull
Progress may have been a good thing once, but it just went on too long. - Yogi Berra
Fusion is the energy of the future....and it always will be
The more complex the idea put forward by the poor amateur, the more likely it will never see embodiment
Fusion is the energy of the future....and it always will be
The more complex the idea put forward by the poor amateur, the more likely it will never see embodiment
-
Jim Kovalchick
- Posts: 717
- Joined: Wed Apr 13, 2011 8:00 pm
- Real name:
Re: Fusor Update - Liam David
Liam,
I meant to say beams not arcs. I can see them in your latest picture.
Jim K
I meant to say beams not arcs. I can see them in your latest picture.
Jim K