Accelerator Tube Revisited
-
George Schmermund
- Posts: 262
- Joined: Tue Aug 15, 2006 8:51 pm
- Real name: George Schmermund
- Location: Carlsbad, CA
Re: Accelerator Tube Revisited
Dennis - Good vacuum joints, whether demountable or permanent, never need 'sealants'. Attention to detail before assembly is all that's necessary. As far as working with high voltage goes, I never approach it without at least a few beers in me. High voltage is too scary to work with when sober!
Anything obvious in high vacuum is probably wrong.
-
Dennis P Brown
- Posts: 3189
- Joined: Sun May 20, 2012 10:46 am
- Real name: Dennis Brown
Re: Accelerator Tube Revisited
There are real machinist like you - those who can make precision parts that can be pressed for high vacuum fit: that is really impressive (no pun intended.) I really enjoy the photo's and work - that accelerator tube is not just a scientific part but art work, as well. Your's is a skill that I really appreciate since I can't even use a micrometer properly while machining ... .
-
George Schmermund
- Posts: 262
- Joined: Tue Aug 15, 2006 8:51 pm
- Real name: George Schmermund
- Location: Carlsbad, CA
Re: Accelerator Tube Revisited
Dennis - For the record I want to say that I'm not a machinist by any stretch of the title. In fact, to assume so would be an insult to the trade. I do have some nice machine tools, though. Being a hard core science hacker I've been driven to make my own parts since high school. Having the ability to work with tools is the only way I have for realizing the ideas and projects that are constantly fermenting in the darker corners of my imagination. Also, I think that making things is fun!
For anyone interested in learning how to use basic machine tools I can recommend spending some time on YouTube channels like http://www.youtube.com/user/mrpete222/videos. There are many other channels that offer basic information about using manual machines and hand tools, but Tubalcain/mrpete222 is one of the best. Practice makes perfect!
For anyone interested in learning how to use basic machine tools I can recommend spending some time on YouTube channels like http://www.youtube.com/user/mrpete222/videos. There are many other channels that offer basic information about using manual machines and hand tools, but Tubalcain/mrpete222 is one of the best. Practice makes perfect!
Anything obvious in high vacuum is probably wrong.
-
George Schmermund
- Posts: 262
- Joined: Tue Aug 15, 2006 8:51 pm
- Real name: George Schmermund
- Location: Carlsbad, CA
Re: Accelerator Tube Revisited
I finally got around to playing with the tube again. After a few days in the vise setup the pressure stayed at ~ 250 pounds. That was a good sign in the overall scheme of things. I setup a quick leak test on one of my trusty Veeco MS-20 instruments and... well, the tube leaks! Not a lot, but more than I thought it would. There are several simple remedies that can be used to correct the leaking (short of sealants, of course), but I was surprised to find that the Delrin was not as conformal as I thought it would be.
The first remedial step will be to use some heat while the parts are under pressure. This should improve the flow characteristics. The same parts can still be used for the new tests. If that works I'll be able to finally justify making a small injection molder! I always learn more from the experiments that don't work than the ones that do. Many times success keeps you sound asleep.
Well, it's Saturday evening and my gin bottle is beckoning me. I'll report progress when it happens.
- Attachments
-
Anything obvious in high vacuum is probably wrong.
-
Peter Schmelcher
- Posts: 228
- Joined: Sat Nov 13, 2010 1:56 am
- Real name: Peter Schmelcher
Re: Accelerator Tube Revisited
I wonder about the rms finish on the copper fitting, I would expect it is not that great. You might dress the surface with a diamond.
-
Dennis P Brown
- Posts: 3189
- Joined: Sun May 20, 2012 10:46 am
- Real name: Dennis Brown
Re: Accelerator Tube Revisited
Sorry to hear that - I too am chasing a leak on my new gun; luckily it isn't the brass KF flange that is epoxied onto the end of the glass accelerator tube!
A word of warning with press fitting copper and ceramic at elevated temperatures - the coefficient of thermal expansion (CTE) of copper is huge compared to the ceramic. As long as the copper temperature is well below that of the ceramic part, this method will work. Otherwise, the copper may crack the ceramic but in any case, upon cooling, will pull away from the ceramic.
Post edit note: first off, sorry if this is an obvious issue to you but many here without experience may not be aware of this problem when they use ceramics and copper in making parts and have to do a heat treatment. CTE mismatch can cause failure in a composite part if it is heat to sufficient degree.
Mitigating this problem can be done by using lower CTE materials like steel. Aluminium, of course, is even worse than copper.
-
George Schmermund
- Posts: 262
- Joined: Tue Aug 15, 2006 8:51 pm
- Real name: George Schmermund
- Location: Carlsbad, CA
Re: Accelerator Tube Revisited
After the disappointment of the tube compression experiment I got to thinking about alternative methods of assembly. The amount of machining that would be needed to fix the sealing problem got the lazy side of my mind into gear and I decided to fall back to conventional methods of putting these type of parts together. I haven't abandoned the parts choice that I'm now using because I still think that the project will be successful once the joining method is improved. I spent some time in the shop today making another set of electrodes and an insulator.
The new insulator has about the size and shape of what the final pieces will be like and I'm continuing with the Cu fittings for the time being. Eventually I'll probably machine similar, though custom, electrodes out of aluminum. The Cu fittings are cheap, readily available, and will allow easy attachment of the bleeder resistors by soldering them on.
I've machined a groove into the Delrin at the base of where each Cu fitting seats when pressed into the plastic and will use this groove to hold a small amount of JB Weld. When the parts are compressed together the epoxy will act as a permanent o-ring on each part. I've also added some grooves on the OD of the Delrin to act as corona barriers. Delrin is such a pleasure to machine that I consider it to be the 12L14 of plastics!
The photos show what the new parts look like. As can be seen, the electrode extends 0.100" past the Delrin insulator. This should reduce the tendency of scattered beam charging.
After another leak test I'll be ready to start testing the high voltage breakdown limit.
- Attachments
-
-
-
Anything obvious in high vacuum is probably wrong.
-
Chris Bradley

- Posts: 2930
- Joined: Fri May 02, 2008 7:05 am
- Real name:
Re: Accelerator Tube Revisited
Have you considered using a rubber joint? For my 'stub' connections I have cut pieces of pure nitrile sheet into short strips that can just reach all the way around the piece to be fitted when held in the hand and that is slightly thicker than the clearance between the two parts. As you work the parts together, the rubber is squeezed and compressed, and the ends of the rubber will be pressed together. It self-seals a treat. In your case, you could even apply a little surfactant to the rubber to allow ease of assembly, then wash all the residues off.
Example: viewtopic.php?f=10&t=3995&p=25632#p25632
Example: viewtopic.php?f=10&t=3995&p=25632#p25632
-
John Futter
- Posts: 1850
- Joined: Wed Apr 21, 2004 10:29 pm
- Real name: John Futter
- Contact:
Re: Accelerator Tube Revisited
George
I have used Sikaflex MS sealant to hold my accelerator sections together instead of the High Voltage Engineering Ltd use of PVA glue.
I needed more strength than the PVA afforded as I have quite a few pounds of stainless cantelevered off the end of the accel section.
I saw somewhere that NASA uses the sikaflex MS as it has extremely low outgassing once cured
pics at the end of this thread on another site of what I have done to join the glass discs to the Al plates http://www.coultersmithing.com/forums/v ... f=45&t=757
-
George Schmermund
- Posts: 262
- Joined: Tue Aug 15, 2006 8:51 pm
- Real name: George Schmermund
- Location: Carlsbad, CA
Re: Accelerator Tube Revisited
Thanks for all of the suggestions concerning progress on the tube. I was going to JB Weld the parts together today and let them spend a day in the mill vise. The epoxy is my first choice because it's what I have on hand. Any port in a storm! I decided to rethink the testing schedule and chose to do the HV breakdown test first. There's no need to proceed forward with this prototype if it can't hold off a useful voltage in air. The gap between the two electrodes is only .072" and the radius on the inside electrode is .050". Reflecting on these dimension made me a little nervous.
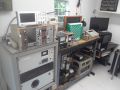
As can be seen in the photo, the tube passes with ease at the 5KV mark. The test was run for 5 minutes using DC. The temperature was 70 deg. F and the humidity was 48%. The barometric pressure was 1011.2 mb. Having previously spent some time polishing the electrodes where breakdown was most likely, It seems that the time was well invested. I had looked up several sources regarding HV breakdown tests and found most of the information quit contradictory and basically useless. I fell back to my old mantra: "One test is worth 100 expert opinions".
I can now finish joining the parts and then move on to leak testing and the real HV test under vacuum.
- Attachments
-
Anything obvious in high vacuum is probably wrong.
-
Peter Schmelcher
- Posts: 228
- Joined: Sat Nov 13, 2010 1:56 am
- Real name: Peter Schmelcher
Re: Accelerator Tube Revisited
George these attachments are on HV insulation design and there worth looking at. I think the work was done for the EU space program.
- Attachments
-
- HV vacuum Metis123201.pdf
- (909.28 KiB) Downloaded 625 times
-
- HV vacuum Metis123209.pdf
- (740.29 KiB) Downloaded 514 times
-
George Schmermund
- Posts: 262
- Joined: Tue Aug 15, 2006 8:51 pm
- Real name: George Schmermund
- Location: Carlsbad, CA
Re: Accelerator Tube Revisited
Peter - Thanks for the links. Their experiments are quite detailed and very interesting to read. I'm sure I'll be able to use the info in upcoming projects.
Anything obvious in high vacuum is probably wrong.
-
George Schmermund
- Posts: 262
- Joined: Tue Aug 15, 2006 8:51 pm
- Real name: George Schmermund
- Location: Carlsbad, CA
Re: Accelerator Tube Revisited
I've finally gotten around to doing another test for breakdown voltage on the accelerator tube electrodes. I was somewhat skeptical about the hold-off ability of the Delrin insulator, but my intended needs aimed only as high as 10 KV/electrode under vacuum. The gap between electrode surfaces is only .072". It was a pleasant surprise to find that the section was good (so far) to 15KV! The aim is for a 10 section tube, so this arrangement should be good for 150 KV with a length of less than 1 foot. The maximum hold-off voltage will be determined in the next round of tests. These tests are being done using a 40KV Spellman HVPS and it has the floating ground option. This option allows the measurement of current far below the metered current on the front panel. Using a Keithley picoammeter, leakage from corona and field emission can be easily evaluated.
Tests are under way to determine the best way to make an equipotential resistor string for the tube. The original plan was going to use 200 Meg resistors when this project first got started, but it will require something closer to 1G ohm/electrode to keep the current drain reasonable for the VdG voltage source.
Tests are under way to determine the best way to make an equipotential resistor string for the tube. The original plan was going to use 200 Meg resistors when this project first got started, but it will require something closer to 1G ohm/electrode to keep the current drain reasonable for the VdG voltage source.
Last edited by George Schmermund on Fri Jul 04, 2014 2:13 pm, edited 1 time in total.
Anything obvious in high vacuum is probably wrong.
-
Dennis P Brown
- Posts: 3189
- Joined: Sun May 20, 2012 10:46 am
- Real name: Dennis Brown
Re: Accelerator Tube Revisited
Since you are aiming for 150 kV for your tube, how will you achieve that voltage?