The first step for the uninitiated, should always be the FAQs; Read, then re-read viewtopic.php?f=29&t=4267 , viewtopic.php?f=29&t=8840 , and viewtopic.php?f=29&t=4266 . Richard Hull goes over everything you need to understand in great detail in these FAQs.
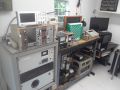
I wanted to see Voltage, Current and Pressure all on the same panel so I can capture all three neatly with a webcam and I wanted to use analog meters so I didn't need to included a separate power source for the meters.
Per Richard's FAQ advice, I purchased two 100uA meters and one 50uA meter from Amazon for about $10 each.
- 100uA Meter on Amazon
These didn't have internal resistors which made the process of calibration simpler.
VOLTAGE:
If you want to measure voltage, your resistor block needs to be in series with your current meter. The flowing current only has one path, so if you know the resistance (selected) and the current (measured) by Ohm's law, you know the Voltage.
For the High Voltage, if you are using a 50uA meter, you need 200MegOhm per 10kV. Where this is only intended for the demo fusor, 10kV is plenty, so I have two 100 MOhm resistors, sealed with some liquid electrical tape on a stand off.
Pay attention to the meter polarity; the high voltage side of the resistor block is negative, so you will need to connect the negative terminal of the current meter to the powered side of the line and the positive terminal to the ground.
This sets the gauge on the meter to read 1kV for every 5uA.
- 200MOhm Resistor Block
VACUUM PRESSURE:
The deadlock vacuum gauge I'm using has a 0-10V proportional output signal for pressure; the lower the voltage the lower the pressure. Same rule applies for this as did for the high voltage as it does for the 0-10V DC signal. Select a resistor amount with the given voltage (10V) so that you get your meter full scale (100uA). R=V/I = 100kOhm. Just so happens that I had a couple 47kOhm and a 10kOhm trimpot Which allowed me to adjust to the correct reading. This made the 0-100uA gauge into a 0-10V meter, which is nice on the math so I only needed to mentally move the decimal point to get the voltage. Armed with the voltage, I then converted it to Torr per MKS' manual which instructed that the pressure can be found using a simple equation: P=10^(Vout -6).
- Deadlock Gauge w/ Breakout Connector
CURRENT:
If you want to measure current safely, you should divide the current between a calibrated shunt and your meter so that most of the current still flows through the shunt, but a smaller and proportional amount of current flows through the meter.
The fusor will be passing current in the mA range, and our meter is a uA so we need a calibrated shunt with the proper resistance to divert 1/1000 of the current to the meter.
I used a length of 28 gauge nichrome wire as the shunt for the current metering.
- Nicrome Wire on Amazon
- Calibrating Shunt
Once I had the length of the nicrome wire shunt calibrated, I wound the wire around a bit on non conductive tubing and taped it in place, being careful not let the wire touch itself. I then wired it to a terminal strip, with a jumper on both end to other terminals so I could wire the meter and the ground wire from the chamber to separate terminals to make it easier if I needed to rewire later down the road.
- Shunt in terminals
- Terminal Strip Mounted
ENCLOSURE:
Once the meters themselves were set, then all is needed is a panel to mount them in. I used what scrap I had lying around for a box. I cut three holes and wired the meter to terminals on the back, again for ease of re-wiring later.
Notice the top meter for pressure has the resistor and trimpot in the enclosure with the meter.
- Inside Meter Panel
- Back of Meter Panel
- Completed Meter Panel